Wednesday, December 14, 2011

SHARKS!


Yes.  I am aware that the whole point of my blog is primarily to tell you about my adventures in arts and crafts, particularly thieving the ideas of others.  I am going to take a few posts and go off course, just a little.  Today, I want to talk about SHARKS!! 


On our recent trip to the Smoky Mountains we decided to take our kids to Ripley's Aquarium of the Smokies.  You see, my kids are boys, 6 and 3.  They love the Kratt Brothers shows, particularly Wild Kratts.  Their favorite episode features - you guessed it - SHARKS!  We had been to this aquarium in the past, but the experience wasn't great, do to no fault of the aquarium.  The last time we went the boys were 4 and 10 months.  My then four year old was HORRIFIED.  He nearly ran through the whole thing.  Scared of the dark, scared of the - SHARKS!, scared of the octopus; he was just plain scared! That day was a nightmare for all involved.  

You might ask why we would try it again...  Well it is amazing the difference that a couple of years can make.  My now 6 year old is totally cool with the dark and - SHARKS! My three year old isn't scared of ANYTHING.  Never has been.  He is all about it. So a fishing (as you might say) we did go. My sincere "Thank you!" to the Kratt brothers for helping to educate my boys on - SHARKS!

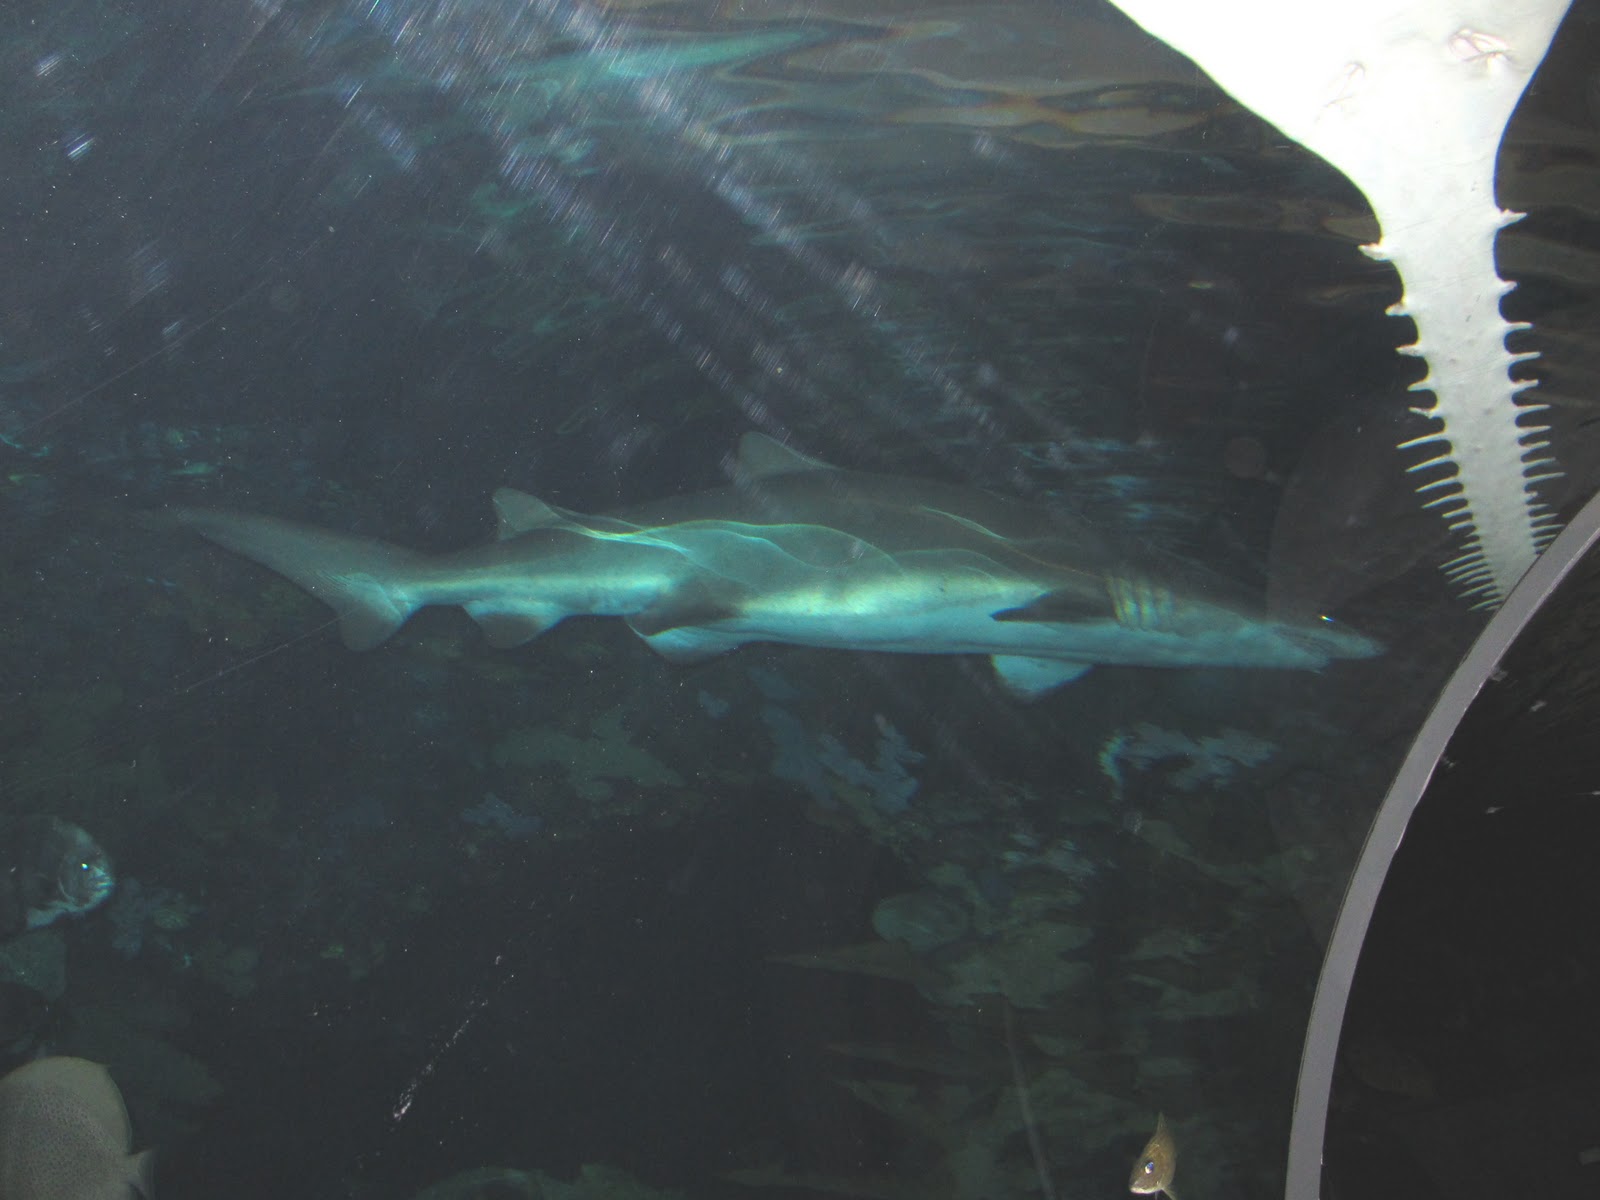
The aquarium is wonderful.  They have beautiful and mesmerizing tanks and sea life exhibits.  Don't believe me? See for yourself...


Did I mention the SHARKS!?
(No children or parents were scared out of their whits while making these photos.)


While the SHARKS! were exciting and awe inspiring, I have to say, and I think my boys would agree, that the African penguins really made the whole day! Particularly a little tuxedo wearing fellow by the name of Steve, who kept the boys entertained for quite some time.


All this doesn't even take into account the hands on stations where you can actually pet a stingray (no barbs) or horseshoe crab, or the many other interactive exhibits you and your children will love!  We had a wonderful experience at Ripley's Aquarium of the Smokies. If you and your family are ever in Gatlinburg, Tennessee, it is well worth the price of admission to take a tour.  Have fun!


Monday, December 12, 2011

Smoky Mountain Christmas

Who knew Santa traded his reign deer for flying pigs?
(Decorations outside Hatfield and McCoy Dinner Show in Pigeon Forge)

My family and I LOVE the Smoky Mountains.  We particularly love Sevier County. Sevier county includes the wonderful towns of Sevierville (Dolly Parton's home town!), Pigeon Forge, and Gatlinburg Tenessee.  Most places go all out for the Holidays, but these three lovely towns really know how it is done!  This is the second year that we have gone to enjoy the sights and sounds of Winterfest and once again, we were not disappointed!  Lights, lights, lights, and more lights!  There are Christmas themed shows including Dolly Parton's Dixie Stampede in Pigeon Forge.  It is just BEAUTIFUL and so much FUN!

This trip we decided to visit the Deer Farm Exotic Petting Zoo in Sevierville and Ripley's Aquarium of the Smokies in Gatlinburg.  When you have kids (or are big kids like my hubby and I) animals are always a good choice. We also had a big breakfast and did some shopping at my personal favorite eatery the Applewood Farmhouse Restaurant, which is surrounded by shops like the Apple Barn and Cider Mill, their own candy shop, Christmas shop, and even ice cream shop!  You could spend all day at this one location. 

This area truly has something for everyone. In Sevierville you can take in a multitude of wonderful musicals and dinner shows or pet exotic animals in one of the petting zoos.  In Pigeon Forge you can take your family to Dollywood, have a fabulous country style dinner at the Old Mill or the Applewood Farmhouse Restaurant, ride go-carts, or go shopping at one of the several outlet shopping centers. In Gatlinburg you can walk the quaint alpine village streets, see the various Ripley's attractions, including Ripley's Aquarium of the Smokies, enjoy the ski lift and views from Ober Gatlinburg, tour the artisan trail loop, or play a game of putt-putt in your choice of venue. You can zipline, horse back ride, or just enjoy the view!  You shouldn't miss the opportunity to see the wonderful peaceful sites of the Great Smoky Mountains National Park. Newly weds, or family's of any and every size will find something that they love about this area.


My boys outside the Applewood Farmhouse Grill in Sevierville, Tennessee.

Over this next week I plan to tell you much more about the adventures we had this visit and share some of our favorite photos from our wonderful Smoky Mountain Adventures!  Stay tuned!


You know who, driving his "red-neck sleigh" outside the Hatfield & McCoy Dinner Show in Pigeon Forge, Tennessee.

Sunday, December 4, 2011

Tis the Season!


For someone like me, with limited free time, the Holidays can prove to lessen the amount of free time for creating. Well, maybe not all creating. There are trees to put up and decorate.  There are mantels, doors, and table tops to dress in Christmas finery. However, in my case at least, after a long day at work, checking home work, getting kids fed and dressed for bed, checking off items from my Christmas shopping list, wrapping, baking, Christmas parties, etc. I am amazed that I have ANY time left at all. Amazingly enough I do manage to find a few minutes here and there to do what I love. Don't be surprised to open a gift from me and find one of my creations made with love!

Monday, November 28, 2011

Signs

As if I didn't have enough going on in my work space, my husband brought me in some pieces of board that he had cut and thought would make good signs. Okay, so I did mention that I would like to try my hand at a few. Of course, due to my new Facebook addiction, I have run across several examples of really great signs and said "I think I could do that..."  That is how it all starts. The serial idea thief in me starts scheming.

Not all of my stolen ideas turn into something I want to do on a regular basis. For one thing, I am incredibly impatient.  Tedious prep work just drives me insane.  This is the reason I took up and quit making fabric purses with only one completed and two more half completed. Who has time for all the measuring, pressing, pinning...? I just wanted to sew!

With sign making, my husband can cut the wood for me and then I can get straight to the business of painting, which I LOVE! I think this new hobby will stick. Well, if I can find time between blogging, Facebook, my full time job, making jewelry, being a mom...  Wow, no wonder I am so exhausted!


Saturday, November 26, 2011

JEKYLL ISLAND CHRISTMAS

I am lucky to live close to the beautiful and historic state park, Jekyll Island. My family and I took the short trip over to the historic district tonight for their annual Christmas tree lighting festival.  It was such a wonderful evening punctuated with a beautiful and exciting fireworks display.

There are only 28 days left until Christmas Day. What will you and your family be doing to celebrate the season?


Tuesday, November 22, 2011

Everyone Needs an Angel: Part II

Now that you have your angels made, you have to decide what you would like to do with them.  You can leave them as they are.  You can let your kids paint them, or add glitter.  There is no limit to what you can do to “finish” these cute little ornaments.  This tutorial may seem like overkill for a simple clothespin craft, but.  I wanted to take something simple and it into an heirloom quality item.  I think I accomplished that.  I decided to “antique” my angels.

I used inexpensive tubes of Apple Barrel paint and Deco Art crackle medium.  I first painted the angels a cream color.  I allowed them to dry.  Then I went over the paint with the crackle medium. 


There are no bonus points for neatness here.  You want the finish to be a little rough.  If the paint is thicker in one spot than another – perfect!  The perfection is in the imperfection! Use the same thought process with your crackle.  As a matter of fact, you don’t have to crackle the entire angel.  If you like, you can just do a spot or two.  Use your own artistic interpretation of “antique.”


Close-up of crackle finish


Now we want to really give it that dirty, dusty, old look.  For this we need stain.  You can purchase a water based stain if you like.  I chose to make my own stain.  To do this I used an olive colored paint and mixed it with water. 


The more water you use, the thinner your paint.  This is completely up to you.  You can experiment on a scrap piece of wood if you like to determine the best consistency for your taste.  My stain is pretty runny.   The crackle finish on my angels is pretty fine and I want the stain to get down into the small crevasses. You can drop your angel in the stain or use a sponge or brush. 


You can rub off excess stain (as I have done) or you can allow the stain to dry as is. I recommend using coffee filters to remove excess stain.  They are lint free and absorbent.  I have found they work best for me.  You will need to let the stain completely dry before moving to the next step.


We are in the final stretch now!

Once your angel is completely dry, we need to put a protective coating on her to keep her looking great.  My choice of medium for this task is paste finishing wax.


Using a small amount of wax and a coffee filter, lightly buff the angel with the wax.  This will give her a protective satin finish.  It adds just the right finishing touch to the antique character of the angel.  A bonus too in that there is no drying time once you are done, you are done! A word of caution though;  buffing too hard can damage your angel.  An angel without wings and a halo, just isn't an angel.  Go lightly and you will be pleased with your outcome.

If you would like your angel to star in your latest Christmas tree production, then you will want to add a string.  I have chosen to use silk cord, like that used for jewelry (mainly because I make jewelry and have it handy), but you may use whatever stringing material you like.


Put a dot of tack or craft glue (something that will dry clear) at the center top of the angel's wings.  There should be enough space to gently tuck the ends of the string so that they are hidden below the wings.  You may need to use a toothpick to aid in hiding the ends of string.  Let this dry overnight to insure a firm hold on the string.

All this work has paid off!  We now have a beautiful angel(s) to adorn our household Christmas scenes!


Monday, November 21, 2011

Everyone Needs an Angel: Part 1

Have you looked at your calendar lately?  I don’t know why, but I keep getting shocked by just how close we are to Christmas!  Only 4 more Sunday’s lie between today and the big day!  Thursday is Thanksgiving!  Black Friday is – THIS FRIDAY!!!  I have already seen outdoor Christmas decoration going up and the stores have been playing Christmas Carols since November 1st!  I feel like I just put away all my decorations for this past year, and still, hear we are again!

The good thing is, I LOVE CHRISTMAS!!!  I love everything about it.  I love the carols, the lights, the blow up Santas and Snowmen!  And here where I live we have temperatures up to 80 degrees this week!  We need all the decorating we can do to really bring that Christmas spirit. I mean, the weather surely isn’t going to be helping us.  Christmas shopping in shorts might be appealing to some, but I find it depressing!    So what can we do to lift my spirits?  Well, sometimes it takes an Angel, or 20…

I have made some really cute and super easy Christmas tree ornaments.  You can make these as simple or elaborate as you like.  I am going to post in two parts.  Today we will assemble our angel.  (Check back tomorrow for finishing touches.)

For materials you will need the old fashioned style clothespins, clothespin doll stands, and some miscellaneous “Woodsies” purchased at my local craft store. I bought a large bag of assorted Woodsie pieces.  Oh, and some wood glue!  That is it.


I first glued my clothespin into the clothespin doll stand.


Next I picked out a small circle from my assortment pack to use as a halo.  I glued it on a little slanted.  Don’t worry.  It is light enough to stay nicely in place.


Then I picked out two teardrop shaped pieces to use as wings.  I glued these to the center of the back of the clothespin under the halo.  Be careful not to use too much glue or it will run and the wings will slide out of place.  The right amount of glue will keep the wings positioned the way you like.


Now you have a finished angel!  This is a great project to do with your children, but I chose to go just a bit further with my angels.  I will share that with you tomorrow in Part II!


Thursday, November 17, 2011

Bailing Out

Let's Make a Basic Wire Bail


Gather all your materials.  You will need wire (I have used sterling silver), a bead or beads ( I am using emerald briolettes), wire cutters, a pair of round nosed pliers, and at least one other pair of pliers of your choice.

Cut a length of wire appropriate for your bead.  (Note: The size of the hole in your bead will determine the gauge of the wire you need.  The higher the gauge number, the thinner the wire.) 

Thread the wire through your bead.
Fold both ends of the wire up creating a triangular shape. Don't fold the ends too tightly. (Note: If you are using a small briolette, as seen here, use caution. They are fragile and will break if the wire is too tight. You want it to "swing" slightly on the wire.)

I apologize for this blurry picture...  Now you should pinch one end of wire between the round nosed pliers.  Bend it at a 90 degree angle away from the crossover point.

Keeping the wire pinched between the nose of the pliers wrap the wire back toward the crossover point over the pliers creating a rounded loop.

Now we are ready to start wrapping.  Pull the leftover end of the loop down and around in front of the other length of wire.

With your other pair of pliers, pull this end of wire tightly all the way around the other wire, as if wrapping a rope around a tree.

Wrap until you are out of that length of wire.  If you have any gnarly ends you can clip it off with your wire cutters.

Wrap the other length of wire in the same fashion around and on top of your first wrap.


Cut any excess wire.  Make sure to tuck or file the end so that there are no sharp edges.

Viola!  Your beautiful bead now has a bail and can be added to your fabulous jewelry!